ArmA 3 Public Alpha has recently updated to 0.54 and one of the new features is…
Added: improved public debug console
This makes testing and debugging scripts much easier. The console is available in editor when you hit Esc button while previewing mission. This allows on the fly interaction with the mission’s variables and objects.
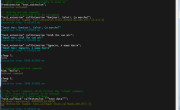
Video shows how to make and run a simple script displaying “hello world” in a hint. Hints are useful when you want to quickly see the output of a variable. Hint command expects a string as argument this is why you should employ the following format when displaying hints, which will let you output any variable, defined, undefined, string, not string, null or otherwise – hint format [“%1”, yourvariable];
Hint will stay on the screen for a few seconds then fade away. Also any subsequent hint command will overwrite the one before it. So if you want to log multiple output use diag_log instead – diag_log format [“%1”, yourvariable]; diag_log will write to .rpt (report?) file, each diag_log call will be new line. The file is located in C:\Users\[yourusername]\AppData\Local\Arma 3 Alpha\arma3_[latestdateandtimestamp].rpt
It is important you use format with both hint and diag_log calls for debug purposes as it will let you see output if it is any or <null>. <null> means the variable output is null, since call returns nothing in our example. any means the variable is undefined now and could potentially be of any value, since we have reset it by assigning nil to it. The .rpt file will also let you know if there were any errors with your script. If script encounters error it can abort, so make sure it is error free. And now for a bit of fun.
By the way, as shown in the above example, if you are planning on using sleep with script in debug console, make sure you use spawn to encapsulate your code like this null = [] spawn {…your code…}; The reason for it is because the debug console script executed with call command and you cannot use script suspension like sleep with call. Will come back to it in later tutorials.
Enjoy,
KK


