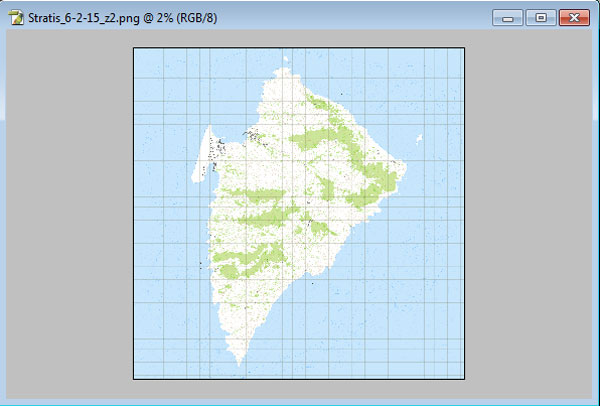
This has been a feature of Arma series since…well quite long time ago. It is possible to export map topography into .emf file, which is kinda vector rasterisation file, convertible into normal images of various resolution. Nice feature if one wants to use ingame map elsewhere. The utility provided by BIS to convert .emf files has optional param [zoom] that will let you adjust the resolution of exported .png. For example this is what Stratis, which I converted with zoom level 2, looks like at 2%:
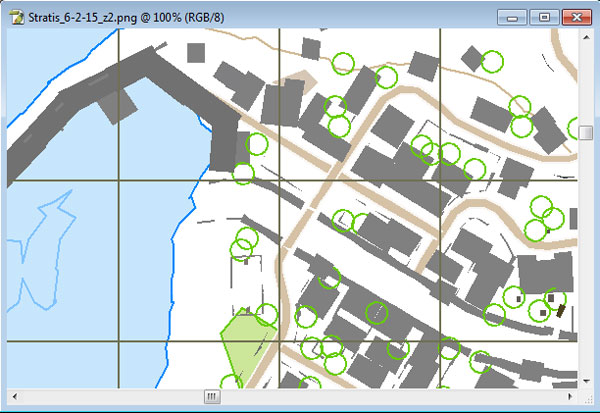
And this is at 100%:
I am going to explain the whole process of exporting further, but if you want to download the files I used for this tutorial, they are available at my Google Drive. Also, not to discourage you but warn against possible waste of time, topography is buggy. The grid exported does not mach ingame map grid (would have been nice to have no grid at all in this case). Also airports are not exported, so you just get blank spaces. Not sure what else is not working properly. Oh, and trying to convert with zoom > 1 could be buggy too. For example Altis is quite large map and trying to convert .emf to .png with zoom might produce errors and the resulting image may have some strange artifacts.
Ok, so if by now you are not discouraged, this is how it works:
- Open your Arma 3 main folder, locate arma3.exe, right click on it and select Run as administrator. The reason for it is that .emf file will be saved at c:\<worldname>.emf location, and on Windows 7 most apps do not have rights to write in that location. Running Arma 3 as administrator should sort this out.
- Go to Editor map you want to export.
- Press and hold Left Shift then tap “–” (minus) on the num pad, release both keys then blindly type topography. If everything done correctly, a small message will flash saying that topography is activated. German users might need to type topographz instead, since they use QWERTZ layout instead of QWERTY.
- Go to c:\ and check for <worldname>.emf file. If you had activation message and no file saved, something is wrong with write file permission to this location, you will have to troubleshoot it on your own.
- Close Arma 3 because it will not release the file otherwise.
- Copy your .emf file into some location where any user can write to the disk.
- Now copy EmfToPng.exe file to the same location. This file can be found in Visitor 3 folder in the Arma 3 Tools package. If you don’t have it, it is available on steam as free download (Library -> Tools)
- At this point you can just drag your .emf file over the converter .exe to start default conversion. However if you prefer to do it with different zoom, you can do it via command line, for instructions run EmfToPng.exe without params.
- If everything went ok, you would have <worldname>.png file created next to <woldname>.emf file.
Enjoy,
KK
EDIT: Added .emfs for Arma 2 maps to my Google Drive, all cleaned up with and without grid: Utes, Chernarus, Proving Grounds, Shapur, Takistan, Zargabad and Desert.
EDIT2: As of Arma 3 1.43.129765 there is new cheat available “ExportNoGrid” which exports plain, gridless topography (XXMAPNAMEXX_nogrid.emf). Also both export methods now export missing airports.