So where was I? Let’s start from the top.
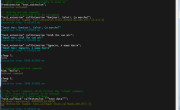
description.ext
The description.ext is kind of abridged version of config.cpp for use in a mission instead of an addon. You can define new classes in it just like in config.cpp but it is limited in what you can define. For example you cannot define CfgVehicles classes but when it comes to interface it is actually much more favourable to construct GUI using description.ext even if you are planning on moving it into an addon later, since you can easily reload the mission to see any changes you’ve made. You should always remember to either save your mission in the editor or reload it when making any changes to description.ext.
Think I should also mention that to read classes from description.ext you need to use missionConfigFile command as opposed to configFile command, which is used with config.cpp.
RscTitles
There are 2 ways you can display your GUI or let’s just call it “resource” from now. You can use createDialog command, which will present your resource as dialog, or display it with cutRsc / titleRsc commands (Rsc stands for resource), in which case it will be treated as display. The difference is that in dialog mode you will have control over your mouse pointer. I will mainly focus on cutRsc in this tutorial.
RscTitle class is a special class and is essential in this case as it serves as a container for your resources. cutRsc command will look inside RscTitles class for your resource and if is doesn’t exist you will get an error message. If you are using createDialog you should not put your dialog resources inside RscTitles.
The format of cutRsc command is:
- layerNumber cutRsc [resourceClass, behaviour, durationMultiplier, showOverMap];
- layerNumber - Could be omitted or could be anything from 0 to at least 1000000 (a million). If you have 2 consequent cutRsc commands on the same layer, the latter will overwrite the former. This is why if you want to terminate currently displaying resource you have to call an empty resource on the same layer. You can make and define this empty resource yourself. If you wish to display both outputs you will have to put them on different layers. Layer with greater number will overlay the layer with lesser number.
- resourceClass - This is your resource class name under RscTitles, in our example it is "ExampleTitle".
- behaviour - Could be one of the following:
- "PLAIN" - Default, plain behaviour
- "PLAIN DOWN" - Same as "PLAIN"
- "BLACK" - Screen turns black with fade in and stays black until the same Rsc layer is overwritten
- "BLACK FADED" - Screen turns black with fade in, stays black for the duration set in resource config then turns back to normal with fade out
- "BLACK OUT" - Same as "BLACK"
- "BLACK IN" - Same as "BLACK FADED" only the duration is 0
- "WHITE OUT" - Same as "BLACK OUT" only white
- "WHITE IN" - Same as "BLACK IN" only white
- durationMultiplier - Could be omitted. The display time of the resource is a sum of fadein + duration + fadeout values defined in the resource config. durationMultiplier will affect the total resource display time. 0.5 will cut it in half, 2 will lengthen it 2 times. 0 will be ignored. Default is 1
- showOverMap - Could be omitted. If you press M and bring up the in-game map, the resource you've created will be shown over the map by default. To hide resource when map is open set it to false (ArmA 3 only)
ExampleTitle
This is our resource class. The name could be anything as long as it doesn’t clash with the existing classes. This is also our canvas. Whatever controls you put inside this class will be shown when we call this resource with cutRsc. For a text resource we have to add a minimum of 2 parameters to this class:
- idd – Display ID. Every display and dialog must have one. It could be a unique number or could simply be -1 like in our case if we are not planning on referring to this display separately.
- duration – For how long (in seconds) our resource should show on screen. In our case it was 1 second. However the total duration also includes fade in and fade out values which in our case we didn’t set and so the engine used some defaults. To set them up you will need to add fadein and fadeout parameters as well to your display class.
controls
Another special class. This is the container for the actual display elements. Other special classes that could be used as such container are backgroundControls and objects.
ExampleControl
Finally the actual display element, which we used to display our text. Again at this point the name could be anything as long as there is no duplicate inside the same class. Minimum required parameters for the text control are:
- idc – Control ID. Each control must have one so that it can be referred to when necessary. Can use -1 if there is no direct reference to the control, but be careful as there are cases when multiple controls in the same class with idc -1 will not function correctly.
- type – Type of control such as text box, button, listbox etc. Each control type has own number which identifies it. Could be Decimal or Hexadecimal. 0 is single line text box.
- style – Display style of control, such as border, no border, text align etc. Style is also identified by the Decimal or Hexadecimal number. 0 – default left aligned text
- x – Control’s top left corner relative X
- y – Control’s top left corner relative Y
- w – Relative width of the control
- h – Relative height of the control
- font – Default font family
- sizeEx – Relative font size
- colorBackground – Control’s background colour {r,g,b,a}
- colorText – Control’s font/foreground colour {r,g,b,a}
- text – Text string or path to texture
This is it for this part. More to come.
Enjoy,
KK
EDIT: A note about idc. -1 is not a special number for the idc, so it seems. You can go negative as well as positive with idc numbering. -24552 is also a valid idc. This is why when you have multiple idc = -1; in the same class, in certain cases you are asking for trouble.